Cantal (latest)
⚙️ Prerequisites
There are a few steps required before you start integrating the iAdvize Messenger SDK.
💬 Setting up your iAdvize environment
Before integrating the SDK, you need to check that your iAdvize environment is ready to use (i.e. you have an account ready to receive and answer to conversations from the SDK). You will also need some information related to the project for the SDK setup. Please ask your iAdvize administrator to follow the instructions available on the SDK Knowledge Base and to provide you with the Project Identifier as well as a Targeting Rule Identifier.
Your iAdvize administrator should already have configured the project on the iAdvize Administration Desk and created an operator account for you. If it is not yet the case please contact your iAdvize Technical Project Manager.
💻 Connecting to your iAdvize Operator Desk
Using your operator account please log into the iAdvize Desk.
If you have the Administrator status in addition to your operator account, you will be directed to the Admin Desk when logging in. Just click on the Chat button in the upper right corner to open the Operator Desk.
The iAdvize operator desk is the place where the conversations that are assigned to your account will pop up. Please ensure that your status is “Available" by enabling the corresponding chat or video toggle buttons in the upper right corner:

If the toggle button is yellow, it means you have reached your maximum simultaneous chat slots, please end your current conversations to free a chat slot and allow the conversations to be assigned to you. If the toggle is red you are not available to chat.
🔐 Ensuring the SDK integrity
Before downloading the iAdvize Messenger SDK artifacts you can verify their integrity by generating their checksums and comparing them with the reference checksums available.
Reference checksums are available:
in the GitHub release note
in the dedicated spreadsheet
The Android SDK consists of an archive (aar file) and a Maven project description (pom file), you can generate their checksums using the following commands (replace x.y.z by the SDK version you are checking):
This ensures that the online packages are valid. In order to check those checksums on the fly, this process can be automated via Gradle by adding a metadata verification xml file at $PROJECT_ROOT/gradle/verification-metadata.xml:
With this file present in your project structure, Gradle will automatically check the artifacts checksums before integrating them into your app. Please note that you will have to do this for all dependencies used in your project. To help you with that, verification-metadata.xml for the SDK sub-dependencies is delivered alongside the SDK. Those subdependencies checksums have been generated through the Gradle generation feature and not verified.
Reference checksums are available:
in the GitHub release note
in the dedicated spreadsheet
Swift Package Manager integration
The iOS SDK only consists of an archive (zip file). You can generate its checksums using the following command (replace x.y.z by the SDK version you are checking):
SPM will also automatically verify that the checksum of the artifact it downloads correspond to the one described in the Package.swift available in the public repository (it's a SHA2-256 checksum).
CocoaPods integration
The iOS SDK consists of an archive (zip file) and a Cocoapods project description file (podspec file). You can generate their checksums using the following commands (replace x.y.z by the SDK version you are checking):
After downloading the SDK through CocoaPods, additional verifications can be made, first by comparing the podspec checksum at the end of the generated Podfile.lock with the SHA1 podspec reference checksum.
The downloaded framework integrity can also be checked by generating the local pod files checksums and comparing them with the online reference ones:
Our React Native SDK plugin is hosted on an external platform called Node Package Manager (NPM) that already has internal checksum validation strategies in order to ensure that the downloaded plugin code (the wrapper code) is untampered.
Our Flutter SDK plugin is hosted on an external platform called pub.dev, that already has internal checksum validation strategies in order to ensure that the downloaded plugin code (the wrapper code) is untampered.
⚙️ Setting up the SDK
1️⃣ Setting up the SDK into your project configuration
First of all, to be able to use the SDK you need to add the SDK dependency into your project. Some configuration steps will also be needed in order to use it.
Add the iAdvize repository to your project repositories inside your top-level Gradle build file:
Add the iAdvize Messenger SDK dependency inside your module-level Gradle build file (replace x.y.z by the latest SDK version available):
The exclude configuration is required because the iAdvize Messenger SDK uses Smack, an XMPP library that is built upon xpp3, which is bundled by default in the Android framework. This exclude ensures that your app does not also bundle xpp3 to avoid classes duplication errors.
In that same file, you also need to ensure that you are using the right Android target to build (iAdvize Messenger SDK is built with Android target 33):
iAdvize Messenger SDK requires a minSdkVersion >= 21.
After syncing your project you should be able to import the iAdvize dependency in your application code with import com.iadvize.conversation.sdk.IAdvizeSDK
You will then need to provide a reference to your application object and initialize the SDK with it.
In your AndroidManifest.xml declare your application class:
This class should then initialize the SDK:
⌨️ In-context example:
The SDK supports video conversations using a third-party native (C++) binaries. If you are delivering your app using an APK you will note a size increase as the default behavior of the build system is to include the binaries for each ABI in a single APK. We strongly recommended that you take advantage of either App Bundles or APK Splits to reduce the size of your APKs while still maintaining maximum device compatibility.
From Xcode go to File > Add Packages, then paste the iAdvize Messenger SDK URL https://github.com/iadvize/iadvize-ios-sdk in the top-right search bar. Select the versioning strategy fitting your app then click on Add Package.
You should then be able to import the iAdvize dependency in your application code using import IAdvizeConversationSDK
⌨️ In-context example: Import
Add this line to your Podfile, inside the target section (replace x.y.z by the latest SDK version available, and choose the versioning strategy fitting your app):
iAdvize Messenger SDK requires a minimum iOS platform of 13.0.
After running pod install you should be able to import the iAdvize dependency in your application code with import IAdvizeConversationSDK
⌨️ In-context example:
The SDK supports video conversations. Thus it will request camera and microphone access before entering a video call. To avoid the app to crash, you have to setup two keys in your app Info.plist
Download the library from NPM using the following command:
Alternatively, you can use Yarn:
The SDK API is then available via the following import:
In your android/build.gradle file, and add the iAdvize SDK repository. You also need to ensure that you are using the right Android framework to build (iAdvize Messenger SDK is built with Android target 33):
iAdvize Messenger SDK requires a minSdkVersion >= 21.
On Android, the iAdvize Messenger SDK needs to be initialized before use to allow several functionalities to work. For instance, the default floating button use an ActivityLifecycleController that must be started before the main ReactNative activity is created, otherwise the controller won't be able to trigger the button display. Thus you need to add those lines in the android/app/src/main/java/yourpackage/MainApplication.java to initialize the SDK properly:
Add this line to your Podfile, inside the target section (replace x.y.z by the latest SDK version available, and choose the versioning strategy fitting your app):
iAdvize Messenger SDK requires a minimum iOS platform of 13.0.
Once this is done, make sure to go to ios folder and install CocoaPods dependencies:
The SDK supports video conversations. Thus it will request camera and microphone access before entering a video call. To avoid the app to crash, you have to setup two keys in your app Info.plist
Download the library from pub.dev using the following command:
The SDK API is then available via the following import:
In your android/build.gradle file, and add the iAdvize SDK repository:
You also need to ensure that you are using the right Android framework to build (iAdvize Messenger SDK is built with Android target 33), as a good practice, also check that you are using the latest Kotlin version in android/build.gradle (you can find the version used in the plugin through its README file)
iAdvize Messenger SDK requires a minSdkVersion >= 21.
Add this line to your Podfile, inside the target section (replace x.y.z by the latest SDK version available, and choose the versioning strategy fitting your app):
iAdvize Messenger SDK requires a minimum iOS platform of 13.0.
Once this is done, make sure to go to ios folder and install CocoaPods dependencies:
The SDK supports video conversations. Thus it will request camera and microphone access before entering a video call. To avoid the app to crash, you have to setup two keys in your app Info.plist
2️⃣ Activating the SDK
Now that the SDK is available into your project build, let's integrate it into your app, first by activating it. Activation is the step that logs a user into the iAdvize flow.
You can choose between multiple authentication options:
Anonymous
For an unidentified user browsing your app.
Simple
For a logged in user in your app. You must pass a unique string identifier so that the visitor will retrieve his conversation history across multiple devices and platforms. The identifier that you pass must be unique and non-discoverable for each different logged-in user.
Secured
Use it in conjunction with your in-house authentication system. You must pass a JWE provider callback that will be called when an authentication is required, you will then have to call your third party authentication system for a valid JWE to provide to the SDK. For a full understanding of how the secured authentication works in the iAdvize platform you can refer to this section.
To activate the SDK you must use the activate function with your projectId (see the Prerequisites section above to get that identifier). You have access to callbacks in order to know if the SDK has been successfully activated. In case of an SDK activation failure the callback will give you the reason of the failure and you may want to retry later.
Once the iAdvize Messenger SDK is successfully activated, you should see a success message in the console:
3️⃣ Logging the user out
You will have to explicitly call the logout function of the iAdvize Messenger SDK when the user sign out of your app.
4️⃣ Displaying logs
To have more information on what’s happening on the SDK side you can change the log level.
💬 Starting a conversation
To be able to start a conversation you will first have to trigger a targeting rule in order for the default chat button to be displayed. The Chatbox will then be accessible by clicking on that chat button.
1️⃣ Configuring the targeting language
The targeting rule configured in the iAdvize Administration Panel is setup for a given language. This means that if, for example, you setup a targeting rule to be triggered only for EN language and the current user’s device is setup with a different targeting language (for instance FR), the targeting rule will not trigger.
By default, the targeting rule language used is the user’s device current language. You can force the targeting language to a specific value using:
This language property is NOT intended to change the language displayed in the SDK. It is solely used for the targeting process purpose.
2️⃣ Activating a targeting rule
Using a targeting rule UUID (see the Prerequisites section above to get that identifier), you can engage a user by calling:
If all the following conditions are met, the default chat button should appear:
the targeting rule exists and is enabled in the administration panel
the targeting rule language set in the SDK matches the language configured for this rule
an operator assigned to this rule is available to answer (connected and with a free chat slot)
After you activate a rule and it succeeds (by displaying the button), those conditions are checked every 30 seconds to verify that the button should still be displayed or not.
Upon the first encountered failure from this periodic check, the button is hidden and the SDK stops verifying the conditions. It means that if the rule cannot be triggered (after the first call, or after any successive check), you will have to call the activateTargetingRule (or registerUserNavigation) method again in order to restart the engagement process.
3️⃣ Initiating the conversation
Once the default chat button is displayed, the visitor tap on it to access the Chatbox. After composing and sending a message a new conversation should pop up in the operator desk.
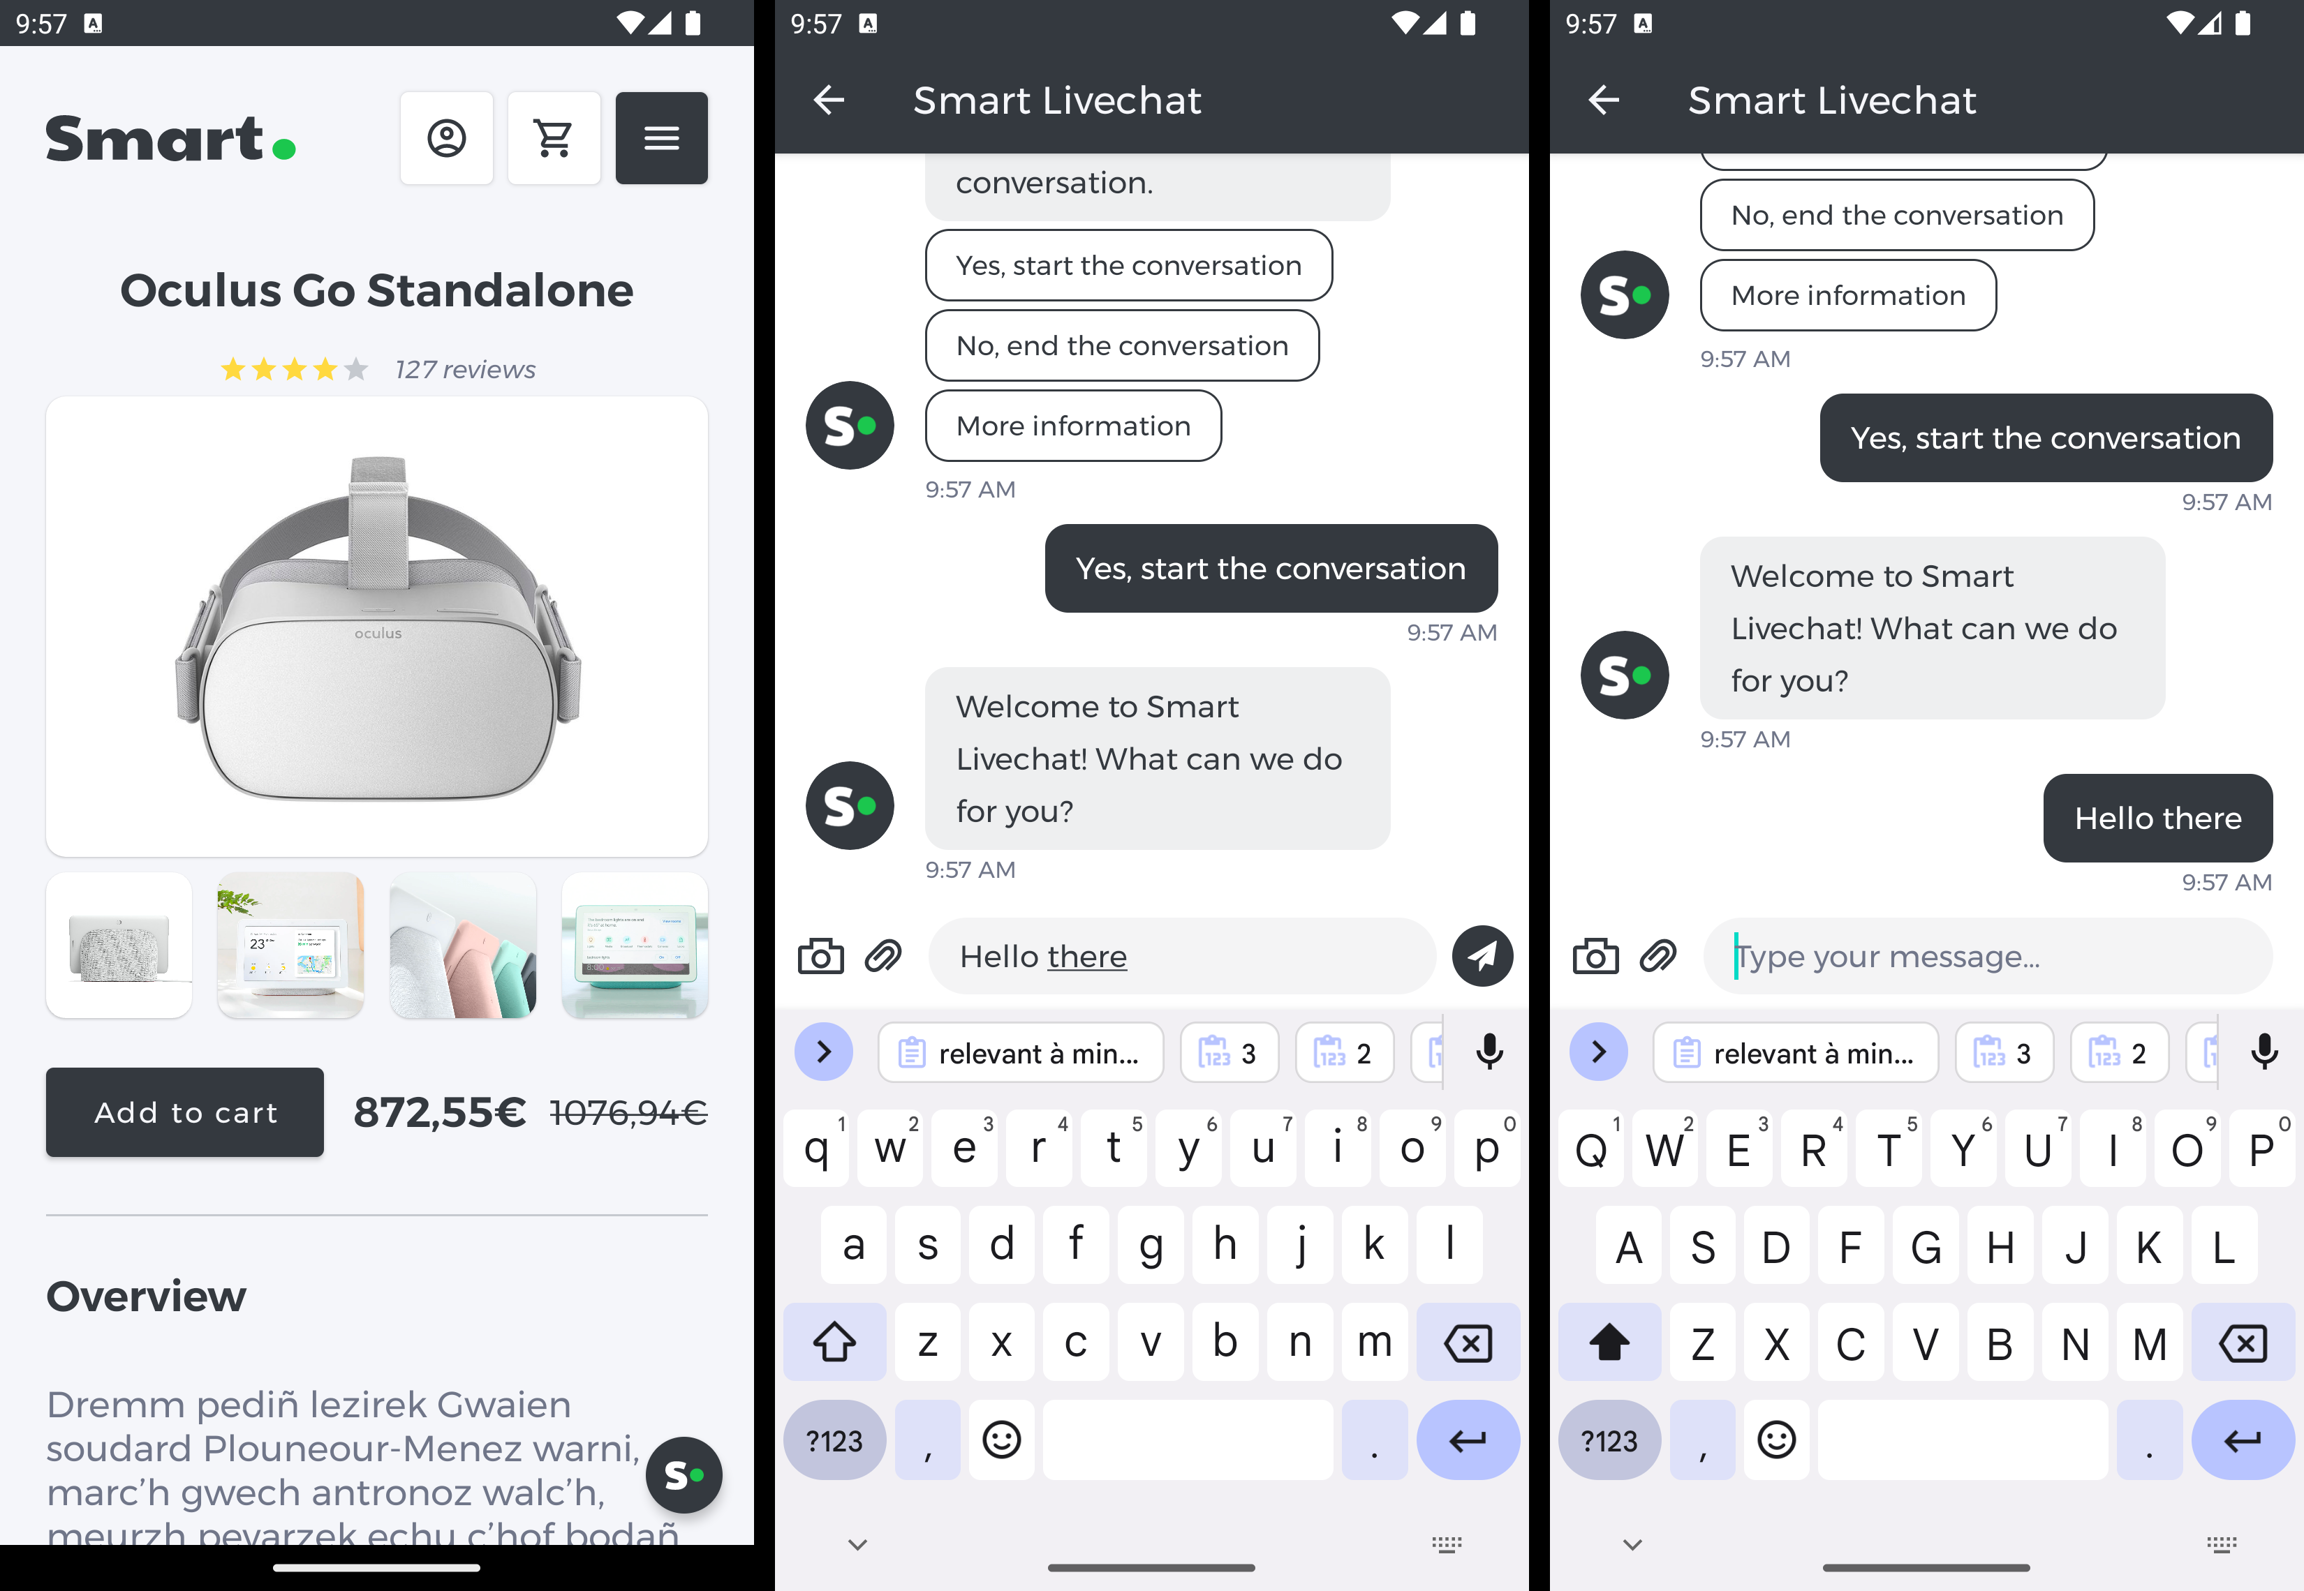
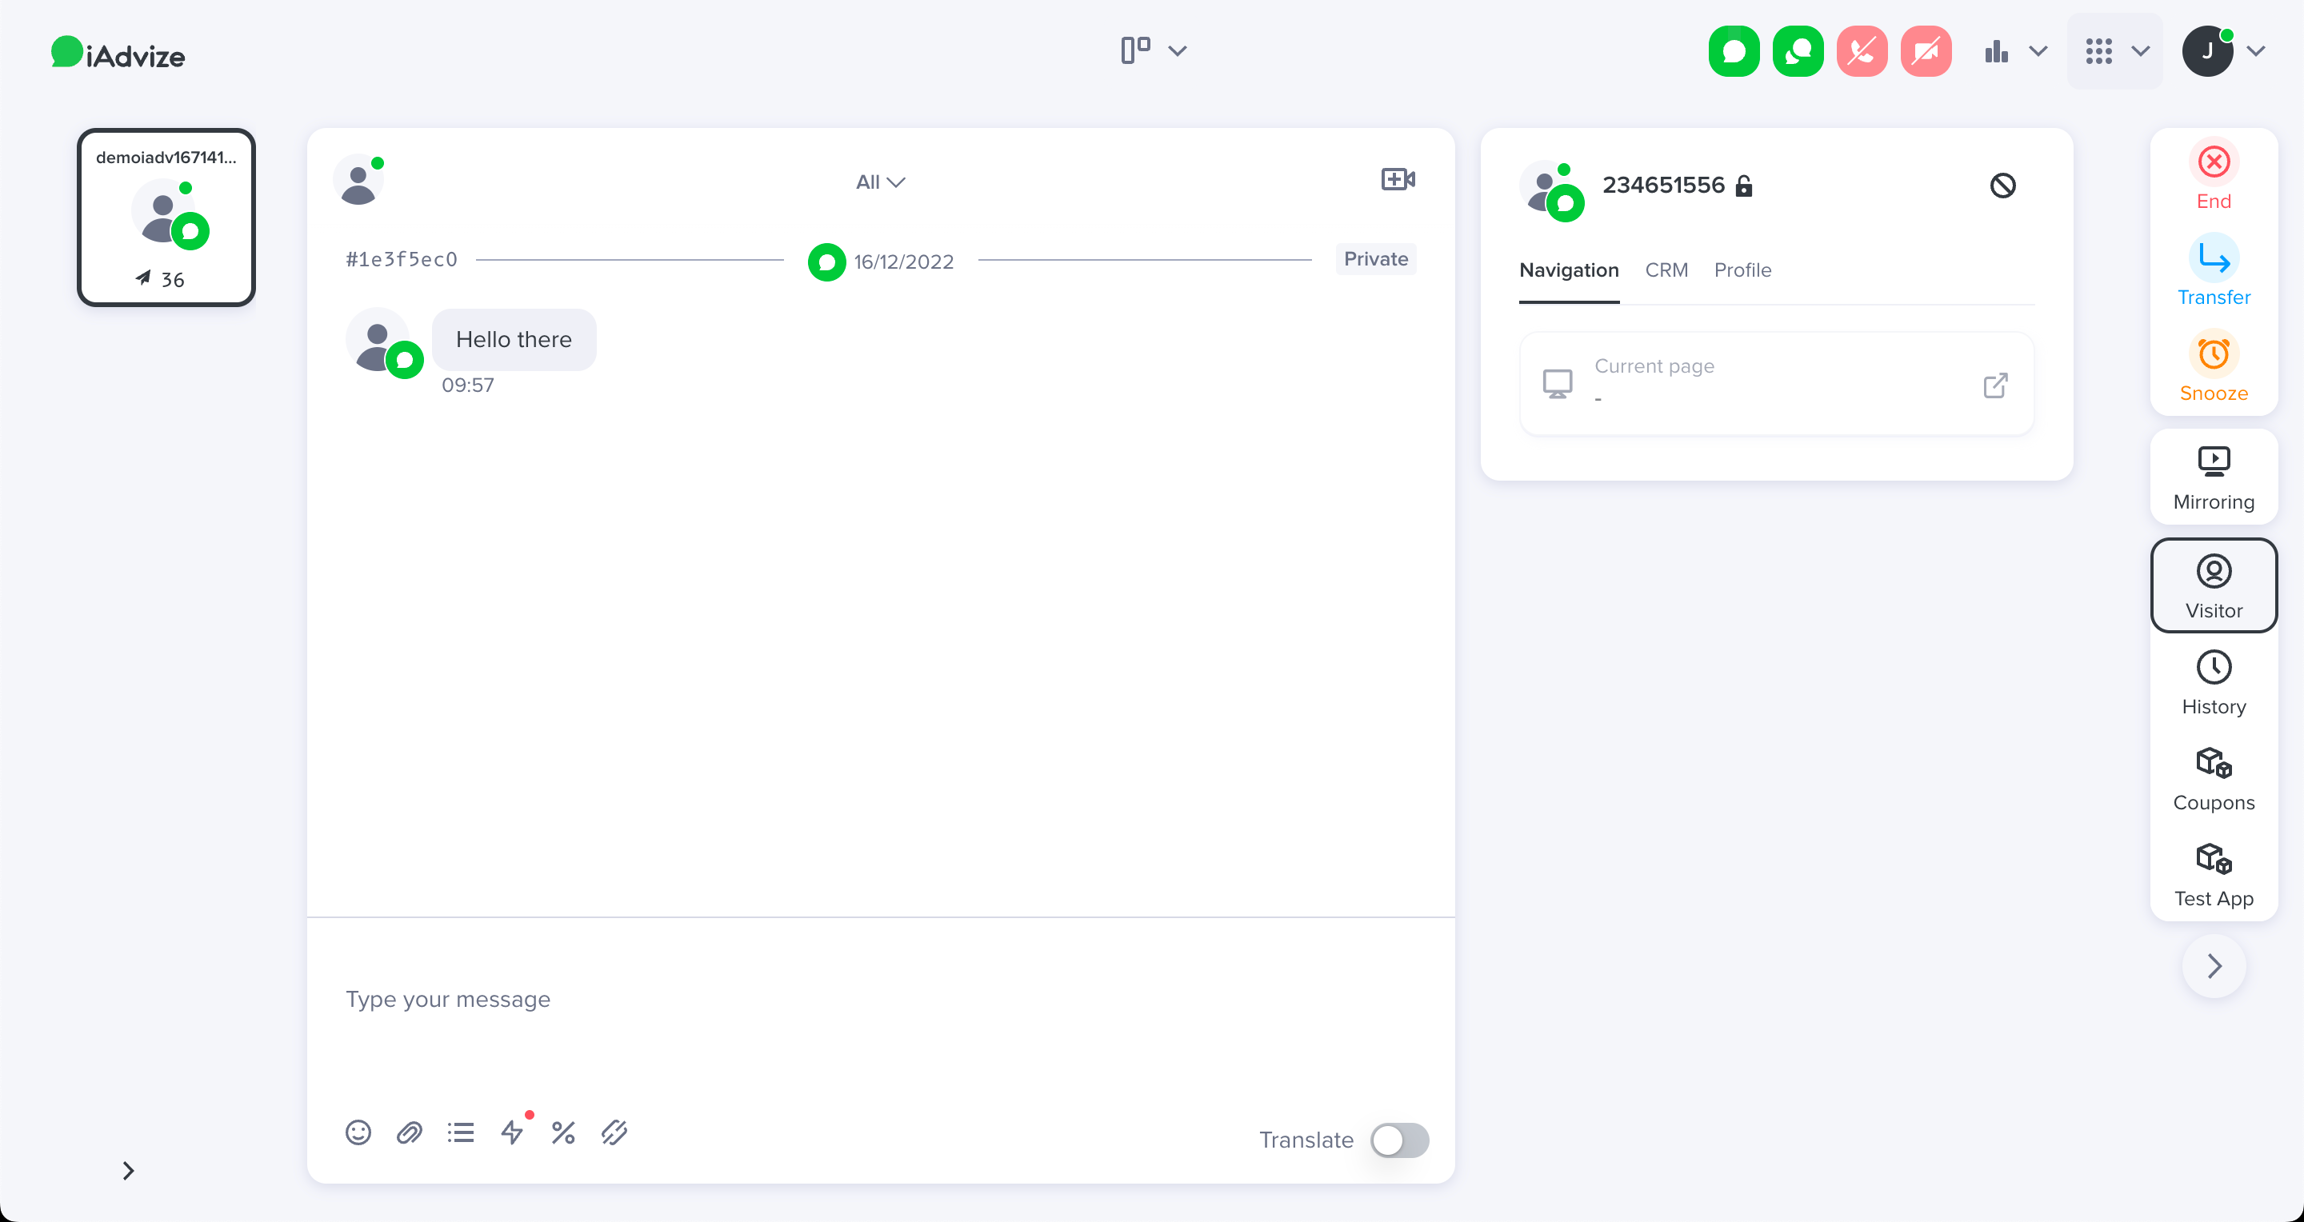
4️⃣ Following user navigation
While your user navigates through your app, you will have to update the active targeting rule in order to engage him/her with the best conversation partner at any time. In order to so, the SDK provides you with multiple navigation options to customize the behavior according to your needs:
Please note that calling registerUserNavigation with the CLEAR NavigationOption will stop the engagement process, and calling it with other options will start it if it is stopped.
👋 Configuring GDPR and welcome message
1️⃣ Adding a welcome message
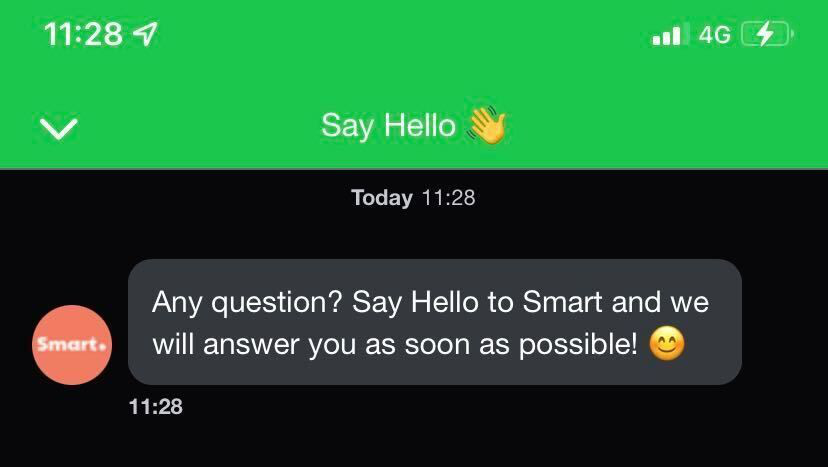
As seen above, the Chatbox is empty by default. You can configure a welcome message that will be displayed to the visitor when no conversation is ongoing.
When no conversation is ongoing, the welcome message is displayed to the visitor:
2️⃣ Enabling GDPR approval
If you need to get the visitor consent on GDPR before he starts chatting, you can pass a GDPROption while activating the SDK. By default this option is set to Disabled.
If enabled, a message will request the visitor approval before allowing him to send a message to start the conversation:
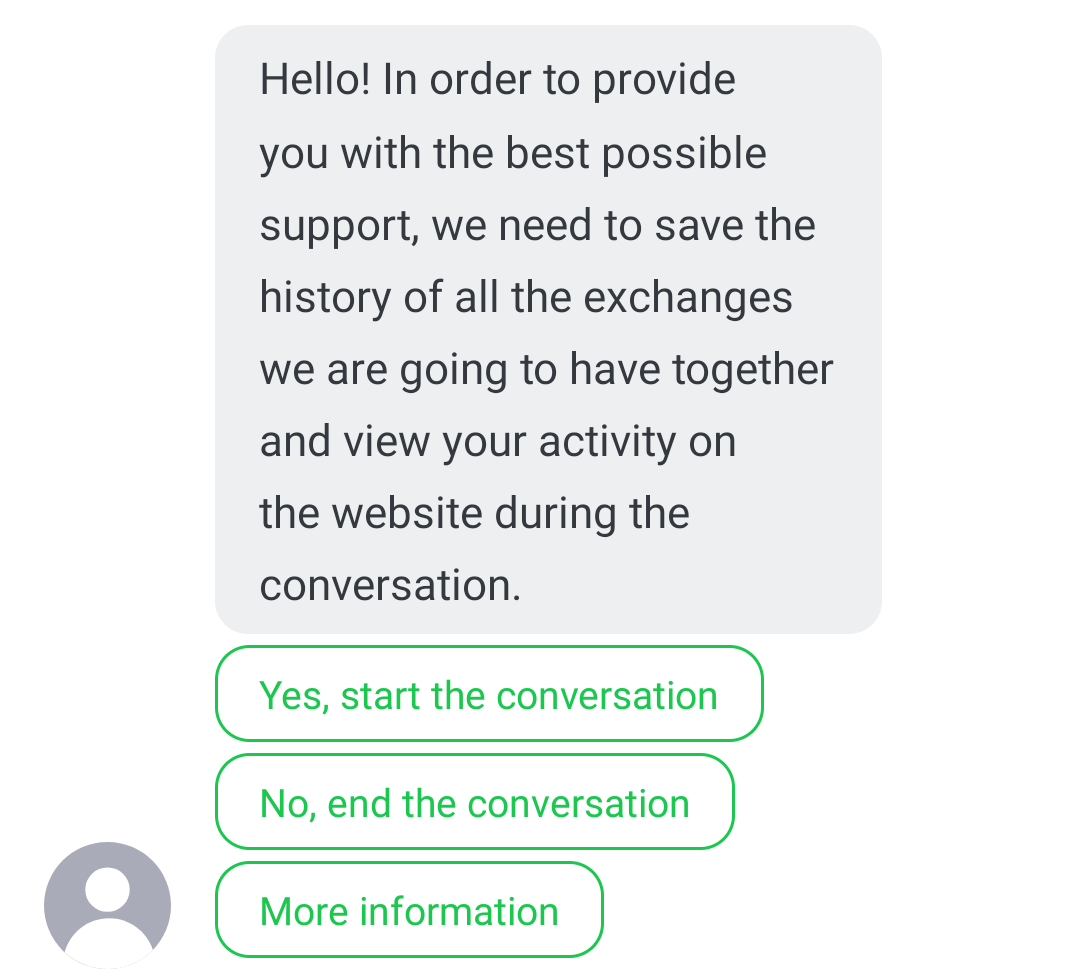
This GDPR option dictates how the SDK behaves when the user taps on the More information button. You can either:
provide an URL pointing to your GPDR policy, it will be opened on user click
provide a listener/delegate that will be called on user click and you can then implement your own custom behavior
If your visitors have already consented to GDPR inside your application, you can activate the iAdvize SDK without the GDPR process. However, be careful to explicitly mention the iAdvize Chat part in your GDPR consent details.
⌨️ In-context example:
⌨️ In-context example:
If you set both the listener and an URL, the listener will take priority.
🎨 Branding the Chatbox
The ChatboxConfiguration object that we used in the previous section to customize the welcome and GDPR messages can also be used to change the Chatbox UI to better fit into the look and feel of your application.
You should setup the configuration before presenting the chatbox. If you call this method while the chatbox is visible, some parameters will only apply for new messages or after closing/reopening the chatbox.
1️⃣ Updating the font
The font used in the Chatbox can easily be updated using your own font:
The font should be placed inside the assets folder. Here the file is located at src/main/assets/fonts/comic_sans_ms_regular.ttf
Even if the UIFont constructor needs a size attribute, the exact font size and traits are automatically chosen and the font is scaled to the current Dynamic Type setting.
The font should either be a system font, or be a font embedded into the app, with a font file inside the bundle and its corresponding declaration into the Info.plist file.
On iOS the font should either be a system font, or be a font embedded into the app, with a font file inside the bundle and its corresponding declaration into the Info.plist file.
On Android the font should be placed inside the assets folder. Here the file is located at src/main/assets/fonts/comic_sans_ms_regular.ttf
2️⃣ Styling the navigation bar
Some parts of the he toolbar/navigationbar appearing at the top of the Chatbox can also be customized:
the background color
the main color
the title
3️⃣ Changing the Chatbox colors
The displayed messages colors can be customized, either the ones from the agent (incomingMessages) or the ones from the visitor (outgoingMessages):
the message bubble background color
the message text color
the message bubble stroke/border color
the accent color, used for all message controls (same color for both agent & visitor): quick answers, file messages, send button, typing indicator...
4️⃣ Using a brand avatar
The operator avatar displayed alongside his messages can be updated for branding purposes. You can specify a drawable either via an URL or a local resource.
If you fill both fields, incomingMessageAvatarImageName will take priority over incomingMessageAvatarURL.
If you fill both fields, incomingMessageAvatarImageName will take priority over incomingMessageAvatarURL.
GIFs are not supported.
🎨 Branding the Default Floating Button
By default, the SDK uses its own Default Floating Button for the user to engage in the conversation. This Default Floating Button display process is automated by the SDK and works out of the box. You have however limited possibilities to brand it to your needs.
The Default Floating Button can be parametrized, both in its look (colors / icon) and position (anchor / margins) using the appropriate configuration:
⌨️ In-context example: Default Floating Button Configuration
The Default Floating Button will use hardcoded icons and the ChatboxConfiguration.accentColor as background color:
The Default Floating Button is anchored to the bottom left side of the screen. You can modify its placement by specifying the button margins:
The Default Floating Button will use hardcoded icons and the ChatboxConfiguration.accentColor as background color:
The Default Floating Button is anchored to the bottom left side of the screen. You can modify its placement by specifying the button margins:
The Default Floating Button will use hardcoded icons and the ChatboxConfiguration.accentColor as background color:
The Default Floating Button is anchored to the bottom left side of the screen. You can modify its placement by specifying the button margins:
✨ Using a custom chat button
If you are not satisfied with the Default Floating Button look and feel or if you want to implement a specific behavior related to its display you may need to use a custom conversation button.
With a custom button it is your responsibility to:
design the floating or fixed button to invite your user to chat
hide/show the button following the active targeting rule availability and the ongoing conversation status
open the Chatbox when the user presses your button
1️⃣ Disabling the Default Floating Button
2️⃣ Displaying/hiding the chat button
The chat button is linked to the targeting and conversation workflow and should update its visibility each time the status of those workflows is changed. First of all you need to implement the appropriate callbacks:
The chat button gives access to the Chatbox so it should be visible:
at all times when a conversation is ongoing to allow the visitor to come back to the current conversation
when the active targeting rule is available, to engage the visitor to chat
3️⃣ Opening the Chatbox
When the visitor taps on your custom chat button you should open the Chatbox by calling the following method:
⌨️ In-context example: Full custom chat button implementation
⌨️ In-context example: Full custom chat button implementation
You can be informed of the Chatbox opening/closing by subscribing to the right listener:
🔔 Handling push notifications
Before starting this part you will need to configure push notifications inside your application. You can refer to the following resources if needed:
You will also need to ensure that the push notifications are setup in your iAdvize project. The process is described in the SDK Knowledge Base.
1️⃣ Registering the device token
For the SDK to be able to send notifications to the visitor’s device, its unique device push token must be registered:
⌨️ In-context example: Device token register
⌨️ In-context example: Device token register
The ApplicationMode is used only for the iOS application.
The ApplicationMode is used only for the iOS application.
2️⃣ Enabling/disabling push notifications
Push notifications are activated as long as you have setup the push notifications information for your app on the iAdvize administration website (process is described in the SDK Knowledge Base). You can manually enable/disable them at any time using:
3️⃣ Handling push notifications reception
Once setup, you will receive push notifications when the operator sends any message. As the SDK notifications are caught in the same place than your app other notifications, you first have to distinguish if the received notification comes from iAdvize or not.
Notifications will be received in your app for all messages sent by the agent. It is your responsibility to display the notification and to check whether or not it is relevant to display it. For instance, you don’t need to show a notification to the visitor when the Chatbox is opened
4️⃣ Customizing the notification
You are responsible for displaying the notification so you can use any title / text / icon you want. The text sent by the agent is available in the content part of the notification data received.
⌨️ In-context example: Handling received notification
By default, the title of the notification is set to the string key iadvize_notification_title. If you want to update/translate this title you can override this value by adding the iadvize_notification_title key in your Localizable.strings file:
📈 Adding value to the conversation
1️⃣ Registering visitor transactions
You can register a transaction made within your application:
2️⃣ Saving visitor custom data
The iAdvize Messenger SDK allows you to save data related to the visitor conversation:
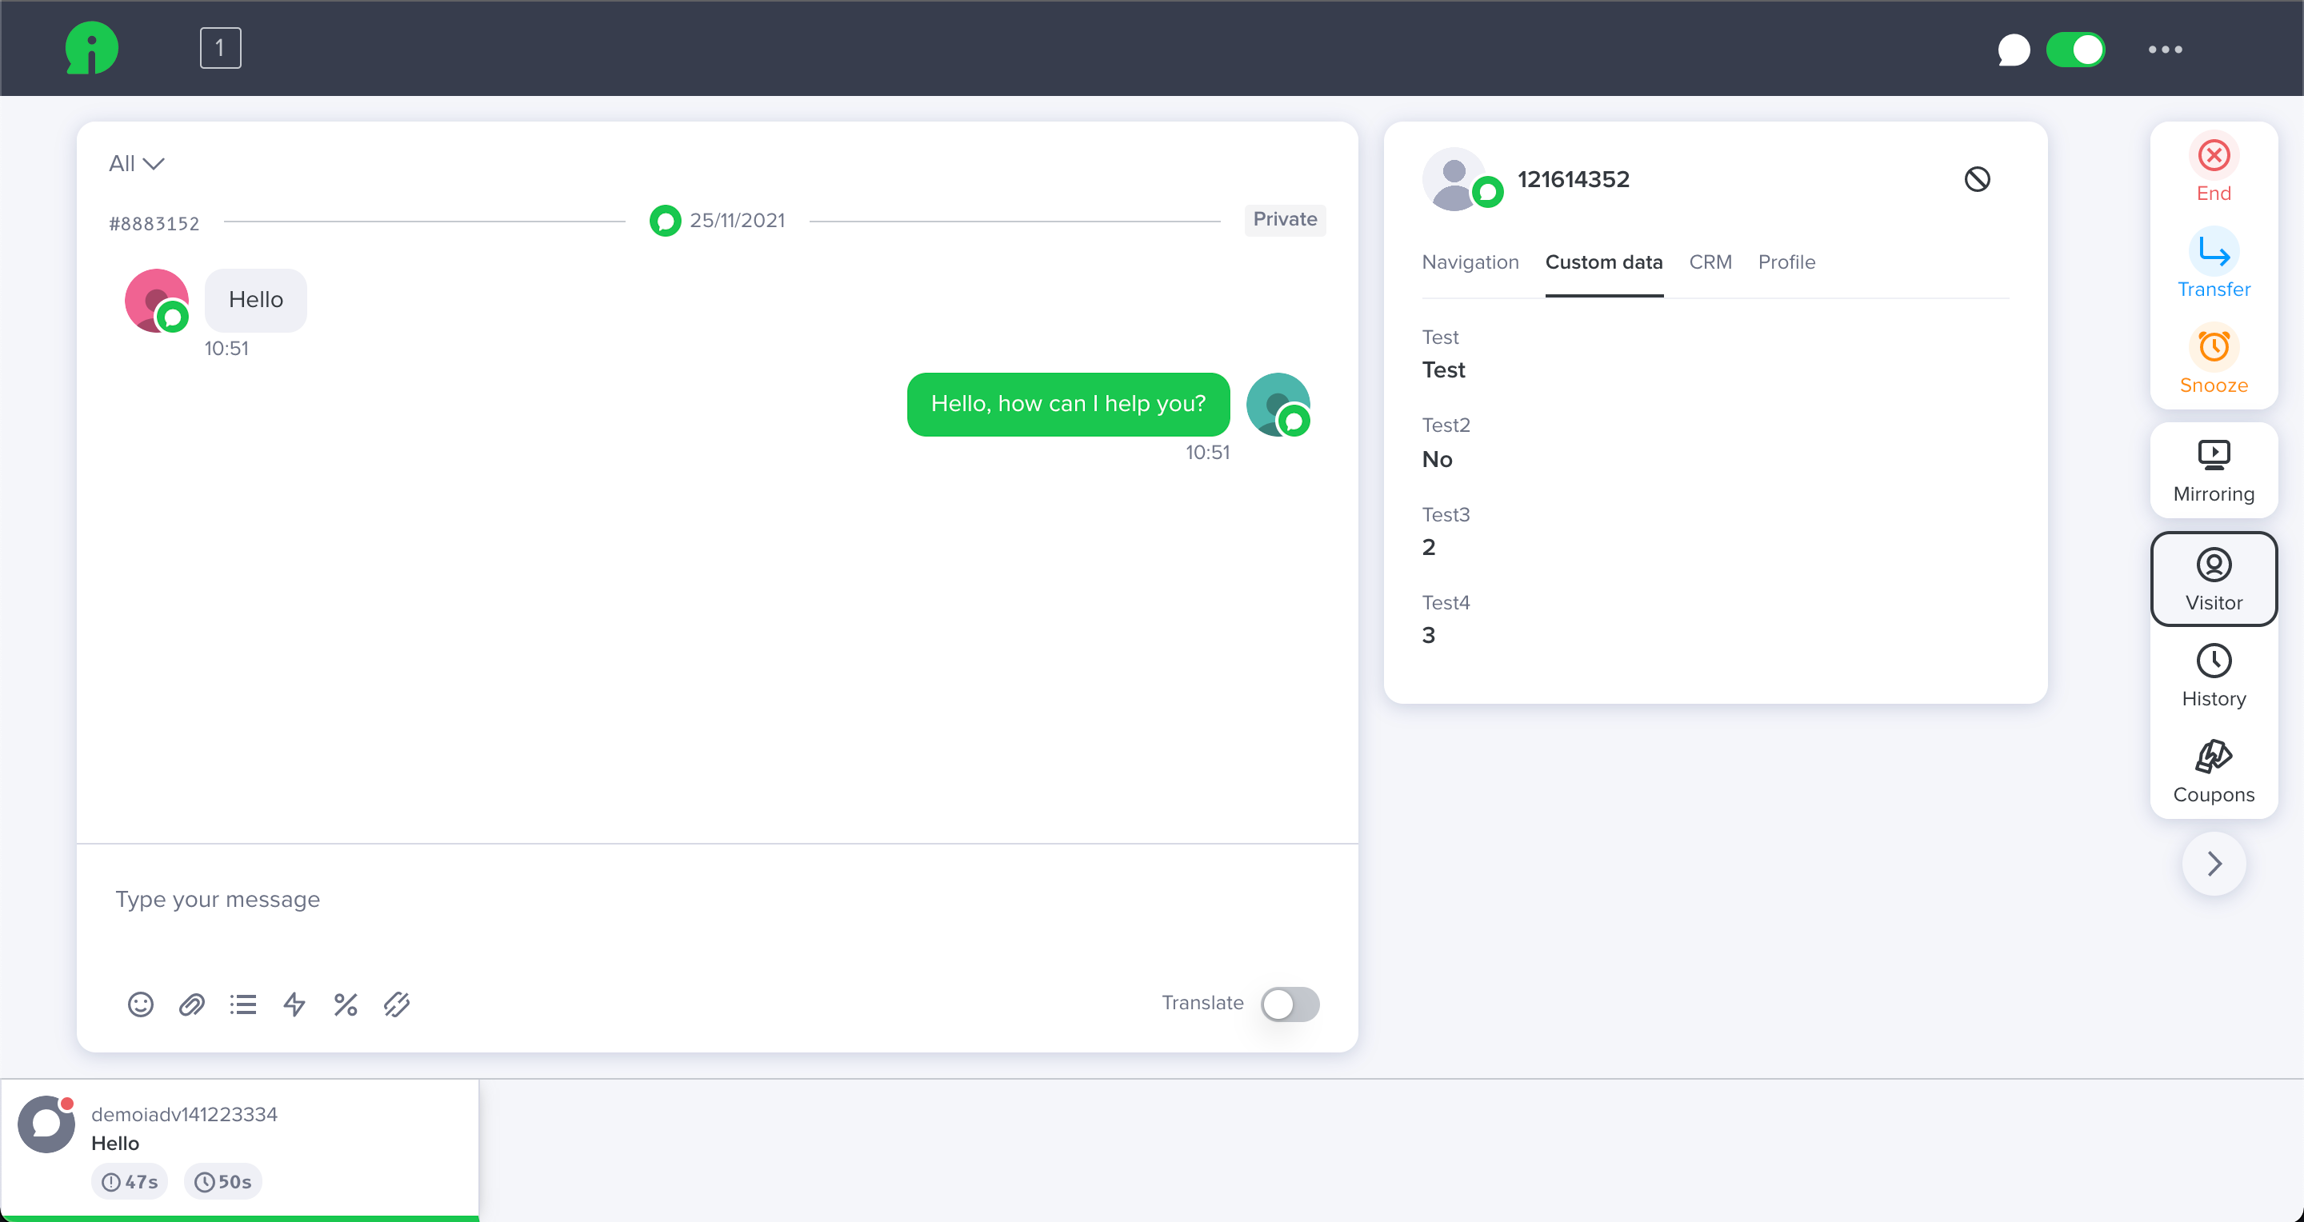
As those data are related to the conversation they cannot be sent if there is no ongoing conversation. Custom data registered before the start of a conversation are stored and the SDK automatically tries to send them when the conversation starts.
The visitor data you registered are displayed in the iAdvize Operator Desk in the conversation sidebar, in a tab labelled Custom data:
👍 Fetching visitor satisfaction
The satisfaction survey is automatically sent to the visitor at the end of the conversation, as long as it is activated in the iAdvize administration website. The survey is presented to the visitor in a conversational approach, directly into the Chatbox.
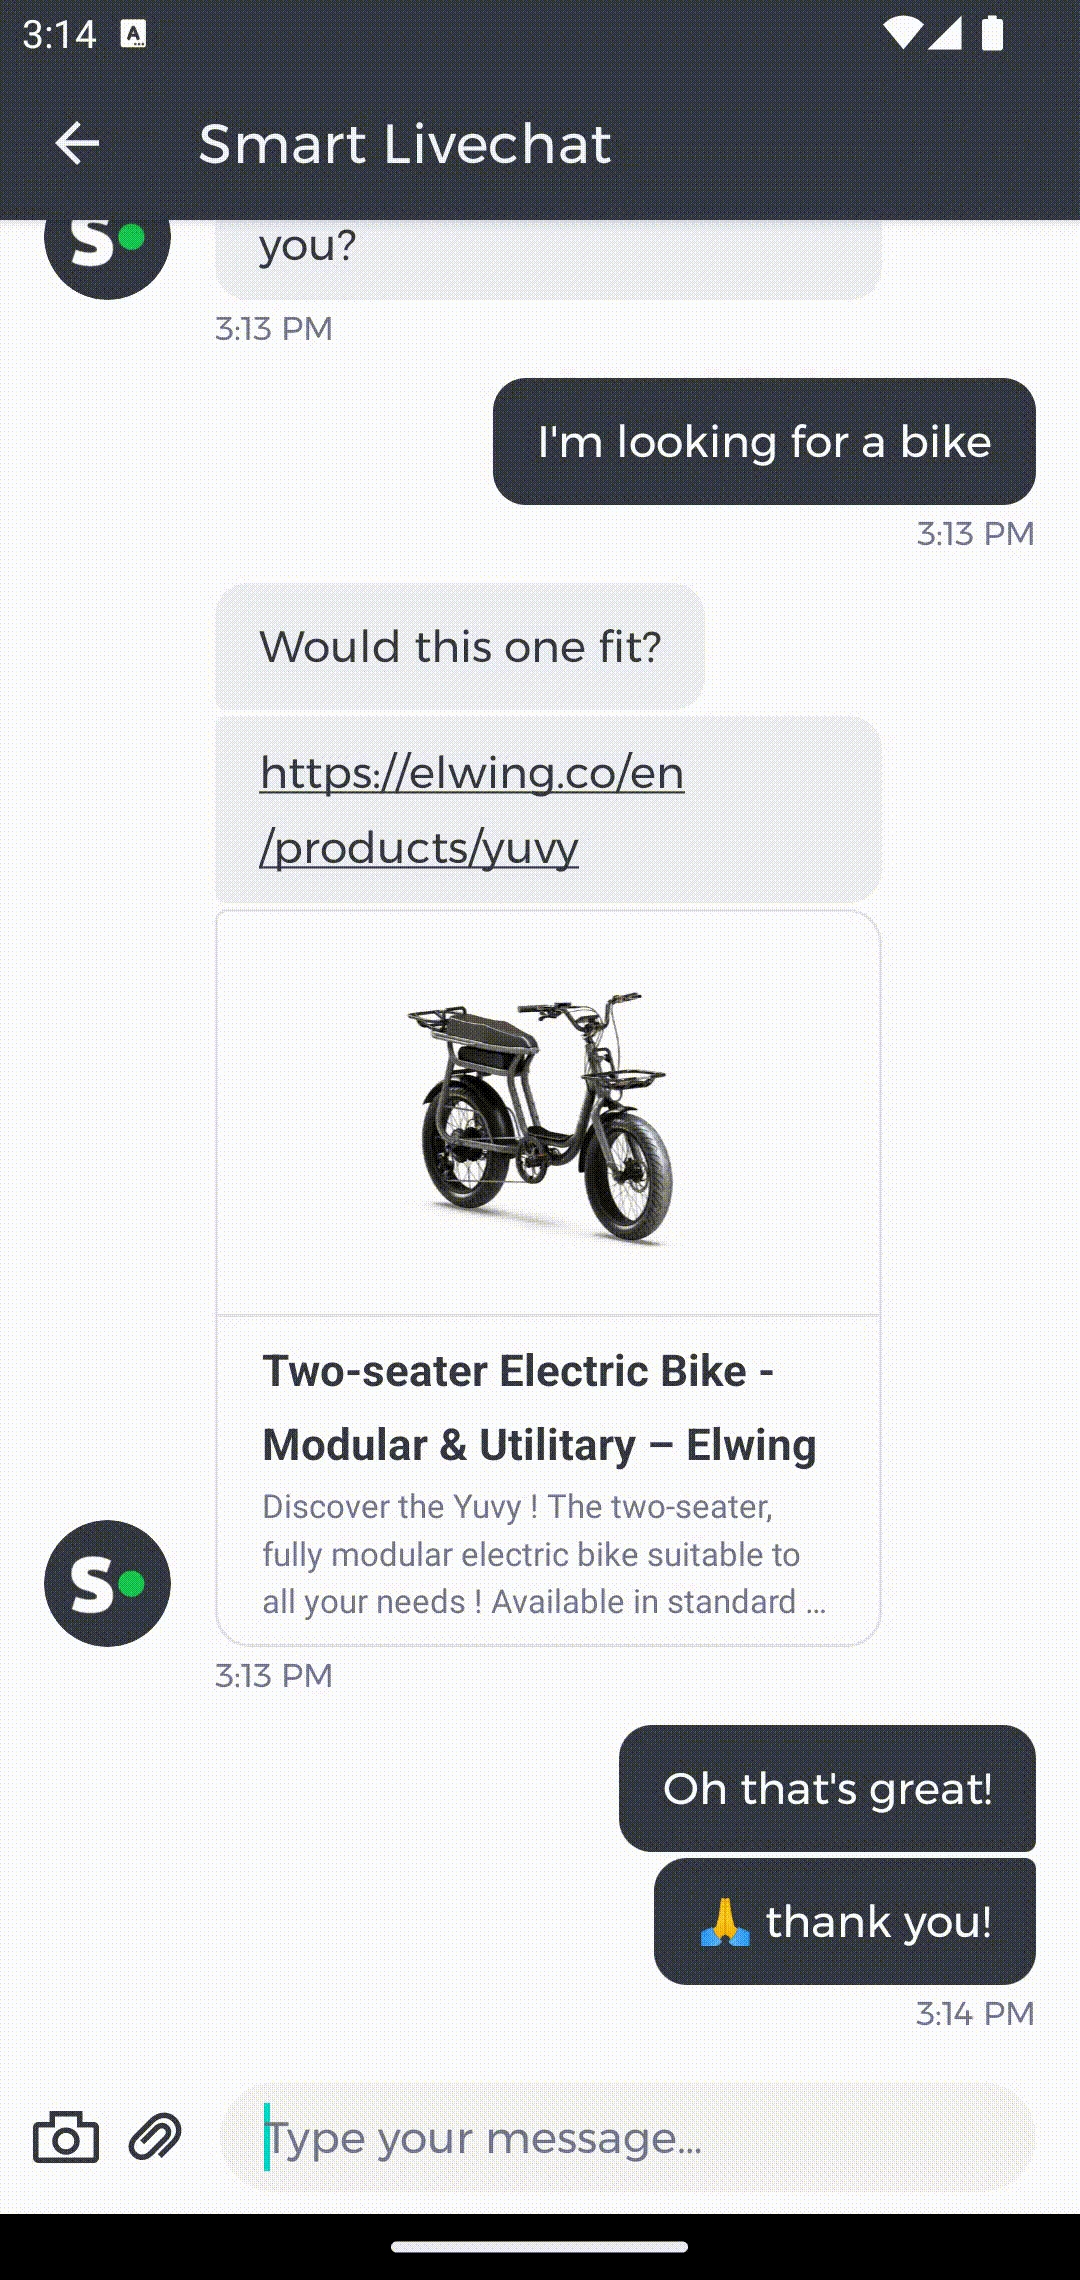
Only the CSAT, NPS and COMMENT steps of the survey are supported.
Last updated